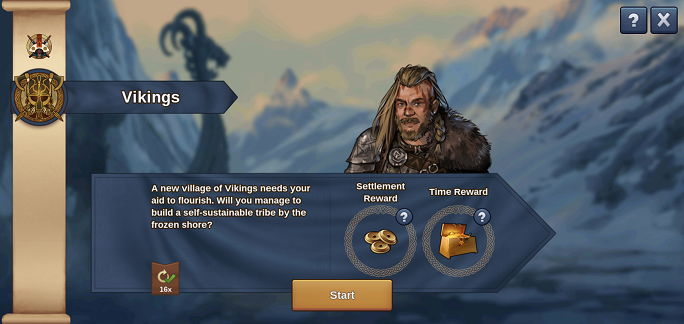
Vikings
Starting
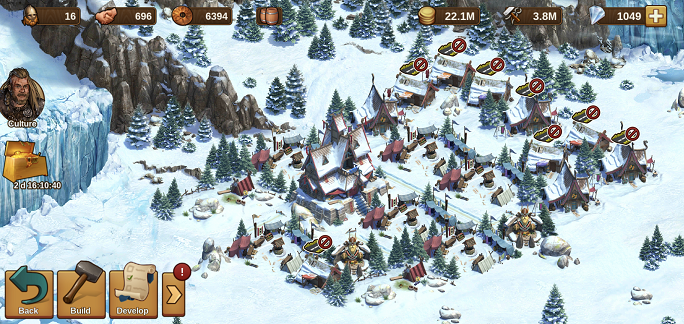
To start a Viking Settlement, select the transportation ship and you will be brought to the Settlement screen. Choose the Settlement by scrolling up/down on the left to the desired one and select "Start".
Rewards
You get the awesome Yggdrasil, Emmissaries and depending on how quickly you finish it, fragments for a Greater Runestone. The time limit will decrease to obtain maximum rewards for each Settlement you complete. The first time you attempt the Vikings Settlement, you will be alloted 16 days to obtain maximum rewards and 22 days for the minimum. Upon successful completions you will eventually only be given 8 days for the maximum rewards and 11 days for the minimum (the reward difference is the quantity of Greater Runestone fragments received).
You will also have a Bonus Multiplier (4 times the basic, goods collection quantity) that will hopefully help for successful completion. The percentage chance of hitting the bonus also increases with each successful completion but cannot be relied upon so you will need to develop a strategy to help shorten your completion time. In short, you have to 'git gud' as you progress through each Settlement if you want the maximum reward set. You can find more information about rewards, Emissaries and time limits here.
Strategy
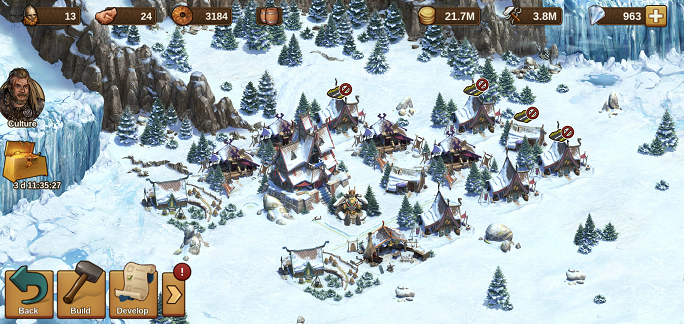
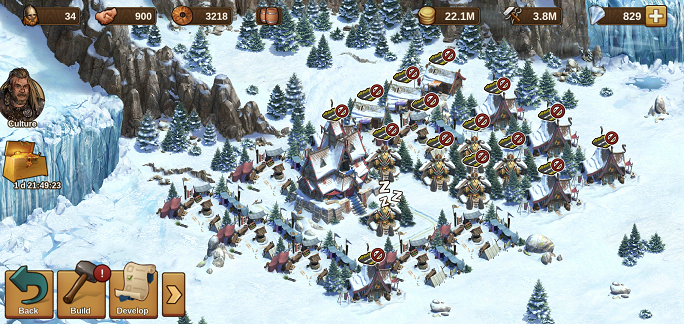
As noted previously, housing is garbage for Settlement currency so prioritize other means to obtain. This will be demonstrated in the following as you will observe disconnected housing in favor of Settlement Coin and Goods production buildings but attempts made to connect housing if viable. In keeping with the previous tips page, observe the absence of any Diplomacy buildings (Runestones, Clan Totems, etc.,) during production periods (coin or goods) as those are solely used to unlock new technology and immediately removed. Finally, utilize every side of the Embassy in the same manner as you would your Town Hall to create road "tentacles" (🐙) so that more land tiles can be used for productions instead of roads.
Companion Guide
Below is a comprehensive commentary that is accompanied by Settlement screenshots, Settlement illustrations and step-wise narrative to provide further insight and details for the 7-Step method summarized on the previous page.
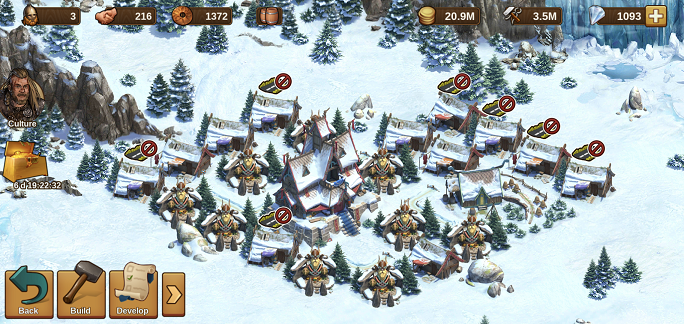
As the Settlement had already been completed many times, the time allotted for maximum rewards is 8 days and 11 minutes. The idea is that one's strategy coupled with the Bonus Multiplier will allow for successful completion for maximum rewards. The percentage chance of hitting the bonus for this Settlement is at a 25% chance which will explain the huge 'jumps' of goods if you observe the time stamps for the screenshots. Those that are in their first handful of runs will NOT be able to complete the Settlement this fast due to multiple coin/goods production cycles needed to build up goods as the chances of receiving the bonus are very low. Please note that NO diamonds were used.

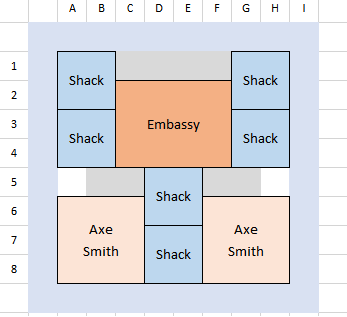
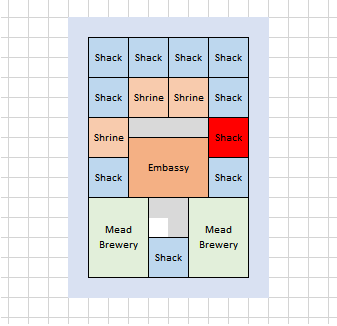
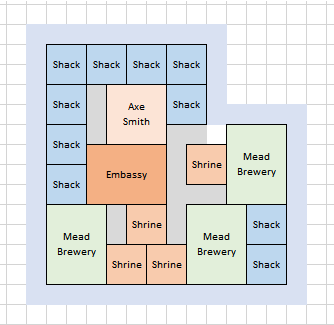
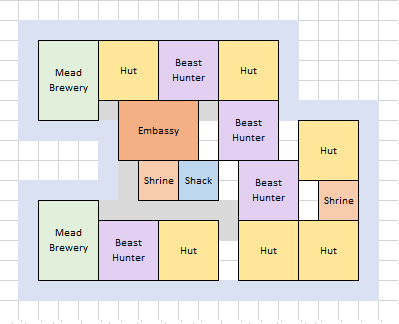
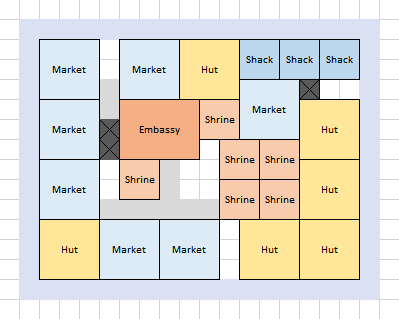
- The picture above is an example of setting up your Settlement after getting past the first two Quests (Shack, Runes) and constructing the Axe Smith. Although there are no obstructions in this scenario, you should still be able to construct two (2) Axe Smiths to start the first 8-hour run (author has only ran into 2 instances of not being able in over 60 runs). Note that the illustration shows the optimal layout as you can connect five (5) Shacks for earning Copper Coins versus only connecting four (4) in the screenshot.

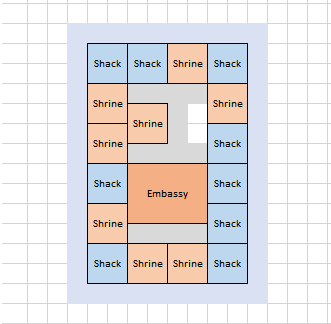
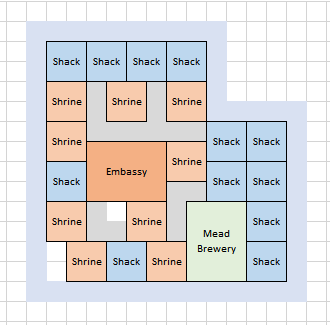
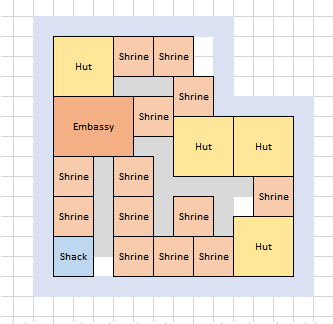
- This picture is after using Axes to purchase two (2) expansions to fill up with Shrines. Notice the Shack road connections are sacrificed for more Shrines, but connected where viable. The trick of straddling a building in front of two others (the three bunched-up Shrines towards the top-left) such that those in the back can be connected is exemplified here and used heavily in Settlements.
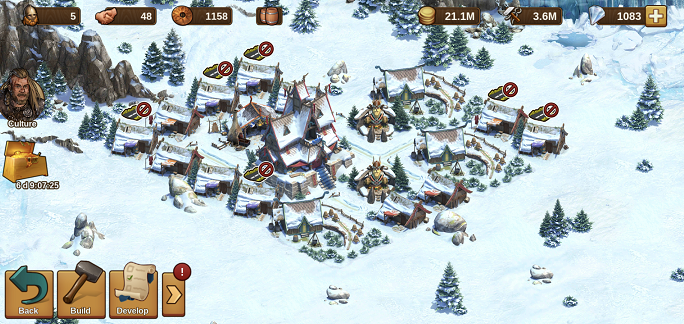
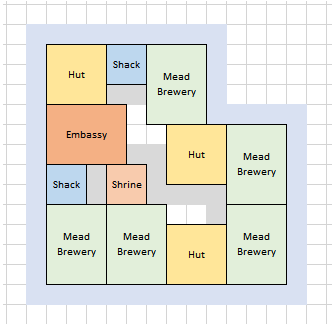
- After unlocking Mead Breweries, two (2) of them are constructed to quickly acquire those next two (2) land expansions. In retrospect after noticing the Population count, more Copper Coins could have been collected by removing the Shack beside the Embassy on the right-hand side (in red) so that the Shacks above and below it could have road connections.
- As shown above, two (2) expansions to the right were acquired using the Mead produced in the previous step. A single 4-hour Mead production is active with the other building removed in favor of Shrines to start acquiring more Copper Coins. The Mead Brewery will be removed after its 4-hour production and replaced with Shrines. The goal is to target 6k Copper Coins so that three (3) production buildings can be set for the next 8-hour production cycle.
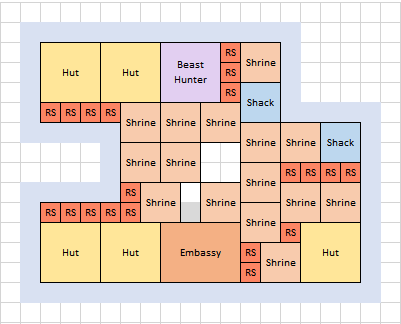
As this a Supply period, the goal was to maximize Copper Coin collections thus the maximum number of Shrines were constructed with multiple instances of the 'straddling' trick to connect as many Shacks as possible for higher currency yield. This is a good example of getting your 🐙 on as well.
- The 6k Copper Coin goal was exceeded such that four (4) production buildings were installed and set for an 8-hour job with 1k Copper Coins were remaining. Five (5) production buildings were attempted but there was not enough space for road tile(s) for connecting to the Embassy, thus Shrines were constructed and Shacks connected where able with use of the 'straddling' trick to maximize space.
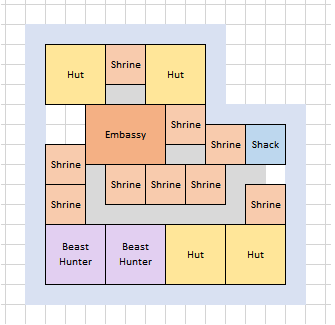
- Replacing the production buildings with Shrines and adding one Runestone allowed an easy unlock of the Hut technology. The initial installation is consisting of four (4) Huts and one (1) Shack given the land arrangement in order to maximize Shrines. A fifth Hut may be installed once the next two (2) expansions are completed after the Beast Hunter is unlocked but that will depend on building arrangments and if one additional Shack will suffice.
Given the the day started with a Copper Coin count of 3k, it would be best suited to collect Copper Coins for the remainder of the waking period to set as many Mead Breweries as possible for 8-hour productions later in the evening. For optimal layout, the Embassy was relocated to optimize the space with three (3) road 'tentacles' 🐙.


- Copper Coin was being produced in abundance and the forecast was plenty to meet 8-hour productions runs later, so Shrines were replaced with a Mead Brewery five (5) hours before the next full Settlement conversion to 8-hour production run.
- The Settlement was switched over to production which allowed the set up of five (5) Mead Breweries. This was accomplished by tucking two (2) Shacks in which allowed for the deletion of a Hut while still meeting population needs for the fifth Mead Brewery.

- Unlocking the Beast Hunter was easy as all production buildings were deleted to make way for Shrines. Two (2) Beast Hunters installed and set for a 4-hour production run to facilitate the next to land expansions. The open spot to the left of the Embassy could not be avoided as multiple attempts were made to reconfigure the Settlement to connect a second Shack; however, there is still some good 🐙 happening here.


- The top-left and bottom-left expansions were chosen to be unlocked to avoid some obstructions and because the Wool Farm (future tech) can be nested in these if needed.
The two (2) Beast Hunters remained as the Copper Coin count remained very high so that some Goods productions could continue although the focus is on increasing Copper Coins. Another Hut (and Shack) was added to account for the extra Population needed for the additional Shrines. Observe the Embassy relocation to straddle the Huts so that the Huts could be connected to increase currency collections.
The Settlement will continue in this Supply gathering mode until time to switch over into full 8-hour production mode.

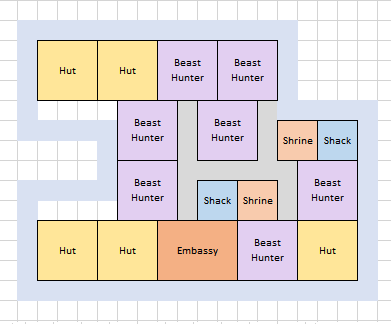
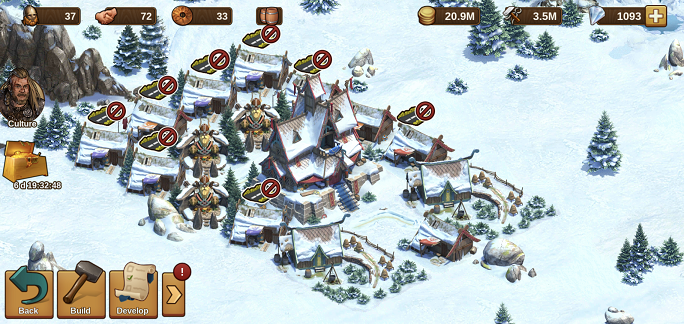
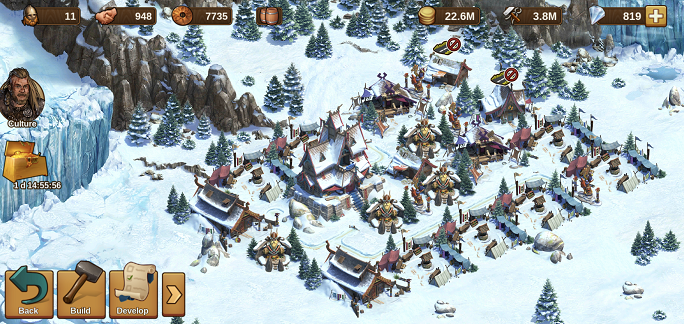
- The Settlement is now in full production mode for 8-hour jobs and the housing units are disconnected to maximize the space for production buildings. In this case, Beast Hunters were constructed for mass production of Horns to meet not just the requirements of the next technology but looking ahead at the gargantuan amount needed for future technologies. Also, the straddle trick was used here for the Beast Hunters in the top right.
The supply and production modes will flip-flop until all Goods are obtained to unlock the Clan Totem and Market to reduce the construction/de-construction of the buildings for saving time especially as Shrines/Runestones are nearly instantenous Diplomacy buildings. This may take 2-to-3 days for first-timers.
- Once all Goods were acquired to unlock the technologies, production buildings were removed and Diplomacy buildings installed. Just like Population, Diplomacy will still count even if it is disconnected. This method allows for fast-tracking technology leaps as it removes long build-times between technology unlocks.
- The above was taken at the same time as #12 to demonstrate how quickly Diplomacy is easy to obtain to unlock multiple technologies curtailing longer build times of some Diplomacy buildings only to have to rebuild the Goods buildings deleted. Even though it wasn't required as there is sufficient quantity of Horns for the next technology, the Beast Hunter was left to demonstrate that this technique works (and there is a hefty unlock requiring Horns much later in the technology tree). Utilize this trick to begin immediate production of Goods if a production building is required for the next cycle, again to save time in the demolishing/reconstruction of your Settlement or buildings.
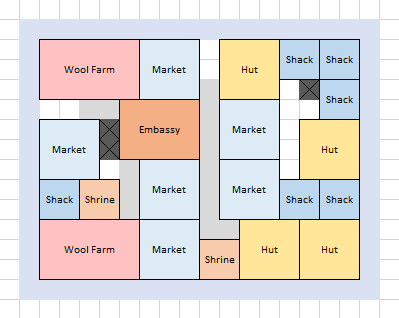
- As observed in the previous, there was at least 3k Copper Coins left in the treasury, therefore it was decided to place three (3) needed production facilities down along with the newly unlocked Market. This will hopefully allow for unlocking the next technology before the next 8-hour production run (if the bonus multiplier will hit). Regardless, once these productions have completed, the buildings will be removed in favor of the Market to build up the Copper Coins for the next 8-hour effort. Note that the Settlement was reworked to connect as many housing units for Copper Coin generation as well.
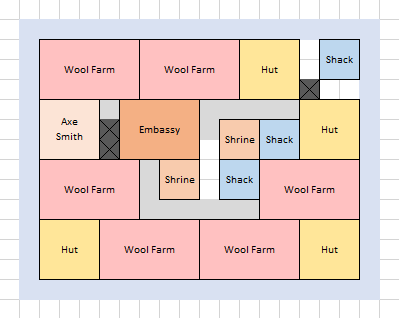
- The Wool Farm could not unlocked before the next 8-hour production cycle, so the production buildings put down were to finish the necessary goods for it with the remainder consisting of Beast Hunters for the huge requirement later. An extra Hut was constructed to accomodate the higher Population needs.
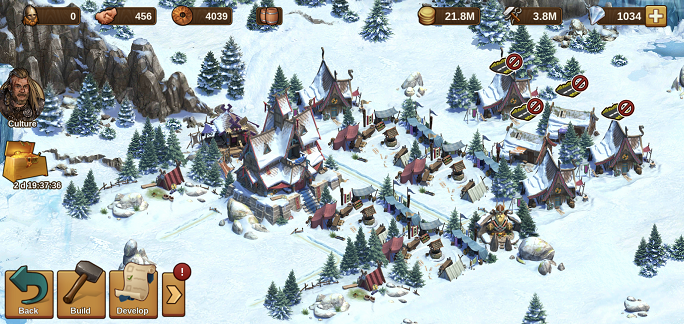
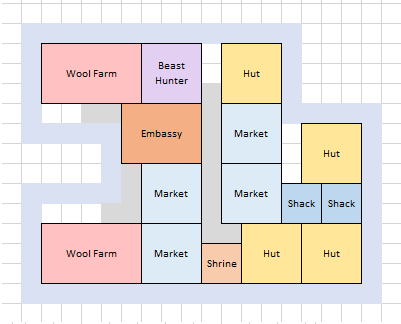
- The Wool Farm was an easy unlock consisting of just Markets. Following the previous methods, two (2) are placed down with 4-hour productions to quickly get the two (2) land expansions unlocked. A Beast Hunter was retained due to looking ahead at an unlock that requires many Horns. The remainder of Copper Coin production will be accompanied by Goods productions but closely monitored to ensure enough Coins to maximize 8-hour productions later. Given the Wool Farm requires less Population, a Hut was removed for a Market with a perfect "0" Population.
- The last two (2) expansions chosen were to simply fill in the Settlement even though others may have been a better choice due to the obstructions (and the upcoming Clan Houses). Working around the obstructions, the Beast Hunter was replaced with a Market but Wool Farms were kept in place as the Copper Coin count was looking to be sufficient for the upcoming 8-hour production.
- Just over 14k Copper Coins were managed to be collected such that seven (7) production buildings could be fielded during the next 8-hour production period. The Settlement was then populated with as many Shrines as possible and organized in such a manner to connect as many Huts for collection of Copper Coins so certain productions could be started immediately in the next cycle. Again, this may take 2-3 days for first timers due to the low bonus percentage chance.
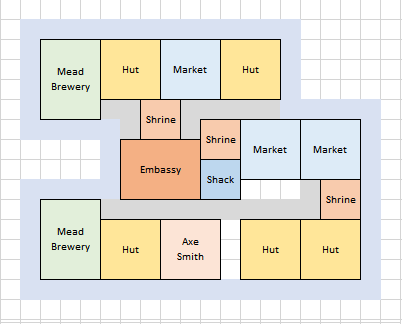
- Enough Goods were had to unlock the Clan House (and more). The timing worked out well because the next cycle was Copper Coin productions so Markets were constructed for Diplomacy versus quicker buildings thus less 'packing in' was needed to meet the Diplomacy requirement. Given the building time of a Clan House (4-hours), additional Huts were installed to support the needed Markets even though they would be phased out throughout the day.
- The above screenshot accompanies #19 and demonstrates the ability to garner Diplomacy by 'packing it in'. This (and the Goods on hand) was sufficient to unlock the Clan House and Old Willow. Traditionally, the Old Willow and Mead Hall would be unlocked together; however, should there have been enough Horns; the roads would have been removed and then all open spaces filled with Runestones for the additional 100 Diplomacy required for all three (3) unlocks to wrap the Settlement up even faster.
- Throughout the coin production period, Clan Houses were swapped for Huts. The recovered space was more than sufficient to install two (2) Beast Hunters to begin collecting the needed Horns for the last technology unlock. Clan Totems were preemptively installed in available spaces for immediate unlock after final Horn collection. Unfortunately, not enough Horns were acquired to unlock the Mead Hall so the Settlement was maintained "as-is" for the 8-hour production run which will yield the necessary Horns (and increase the Copper Coin count above 10k needed for final Goods production). The Markets will not be collected until after the Mead Hall unlock and quests met to trigger the final Quest and then to help satisfy the Copper Coin gathering requirement. Man, the 🐙 is strong here.

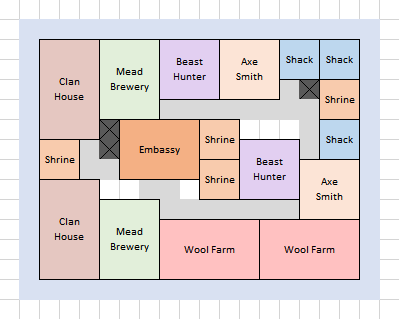
- After unlocking the Mead Hall, construction of two (2) Old Willows were started and immediately deleted followed by one (1) Mead Hall which was also deleted after Quest recognition. The Markets were collected and then the final setup shown above included two (2) of each production buildings, each set to a 4-hour production run to wrap up the final Quest. Additional Shrines were thrown in to shore up the needed Copper Coins as the Clan House collection time was two hours after the expected Goods production collection time (not an issue, but just to be finished faster).

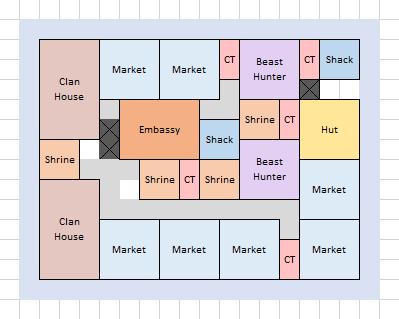
- In all, this was a good run. There was twenty (20) hours remaining for the maximum reward set at the time of completion which brings the total time to about 7 days. Shown above, the rewards reflect the maximum set as denoted by the 50 FP (the default reward provided after achieving a maximized Yggdrasil), and fifteen (15) Greater Runestone fragments which is sufficient to construct a Level 1 Greater Runestone or provide an upgrade to an existing Greater Runestone (up to Level 5).
Advanced Strategy and Tips
- To save some bulldozing and reconstruction time, observe the 'quick build' feature as you construct buildings early in the Settlement. In many instances, those that take less than a minute can be instaneously built for zero (0) diamonds, but you will still need to click the 'purchase'. Also, for the longer construction-time buildings, the diamond cost will go down as time progresses such that you can finish the construction of the building if there is less than five (5) minutes remaining for zero (0) diamonds as well.
- Always look ahead on the technology tree so you may take advantage of any available space for extra Goods production for those larger requirements that are coming (see #15 above). In this particular run, it was Horns and any available space that wasn't required to be used for the next technology unlock was given to the Beast Hunter for Horn production. Using this tip allowed for a successful completion with maximum rewards and almost allowed for completion time eight (8) hours earlier.
- Once your chance at a Bonus Multiplier is higher, start the Settlement the first thing in the morning for a chance at a large technology leap (this will depend on your time availability). Using the set up in #1 will allow for: (1) multiple collections of Copper Coins from connected Shacks and (2) increased chances of receiving the multiplier bonus by conducting 4-hour productions from the Axe Smiths. With a little luck, this will allow for unlocking the Mead Brewery technology before your first 8-hour production period. The Settlement then would only have one (1) Mead Brewery with the remaining space devoted to Shrines for the 8-hour production period. Again, familiarity and experience with the Settlement will help guide.
Go back to Settlements.
Go back to Home Page.